
Six - 1 lb. loaves or four 9"x 5" loaves
6 cups Water – filtered is best
10 cups Hard White Wheat Kernels
OR approx. 12 cups Milled Whole Wheat Flour
1 ½ Tbsp Table Salt
1/2 cup Canola Oil
1/2 cup Honey/Dark Brown Sugar/Molasses
3 Tbsp Kitchen Resource Dough Enhancer*
3 Tbsp Saf brand Instant Yeast**
1/2 cup Dry powdered milk (opt.)
1/2 cup Nine Grain Cracked Cereal(opt.) or a mixture of cracked grains***
Four - 1 lb. loaves
4 cups Water – filtered is best
7 cups Hard White Wheat Kernels
OR approx. 8 cups Milled Whole Wheat Flour
1 Tbsp Table Salt
1/3 cup Canola Oil
1/3 cup Honey/Dark Brown Sugar/Molasses
2 Tbsp Kitchen Resource Dough Enhancer*
2 Tbsp Saf brand Instant Yeast**
1/3 cup Dry powdered milk (opt.)
1/3 cup Nine Grain Cracked Cereal(opt.) or a mixture of cracked grains***
Three - 1 lb. loaves
3 cups Water – filtered is best
5 ½ cups Hard White Wheat Kernels
OR approx. 6 cups Milled Whole Wheat Flour
2 tsp Table Salt
1/4 cup Canola Oil
1/4 cup Honey/Dark Brown Sugar/Molasses
1 ½ Tbsp Kitchen Resource Dough Enhancer*
1 ½ Tbsp Saf brand Instant Yeast**
1/4 cup Dry powdered milk (opt.)
1/4 cup Nine Grain Cracked Cereal(opt.) or a mixture of cracked grains***
Two - 1 lb. loaves
2 cups Water – filtered is best
4 cups Hard White Wheat Kernels
OR approx. 4 cups Milled Whole Wheat Flour
1 ½ tsp Table Salt
3 Tbsp Canola Oil
3 Tbsp Honey/Dark Brown Sugar/Molasses
1 Tbsp Kitchen Resource Dough Enhancer*
1 Tbsp Saf brand Instant Yeast**
3 Tbsp Dry powdered milk (opt.)
3 Tbsp Nine Grain Cracked Cereal(opt.) or a mixture of cracked grains***
Note: Choose the batch size according to the capacity and power of your mixer. The 6 lb. loaves-batch is for a 6 quart Bosch mixer. The 4 lb loaves-batch is for a 6-quart Kitchen-Aid mixer, the 3 lb and 2 lb loaves-batch are for a 5 quart Kitchen-Aid mixer. Use a metal 8 ½” x 4 ½” standard loaf pan per 1 lb. loaf.
DIRECTIONS
Freshly grind wheat kernels into flour. Heat the water to a very warm temperature: hot, but not burning, to the touch. Pour the water into the mixing bowl. If using cracked grains or brown sugar, add them to the water. Add about half to two-thirds of the ground the flour. (For a Kitchen-Aid mixer use the paddle attachment to begin with; for a Bosch mixer use the dough hook through out the entire recipe.) Mix on the lowest speed until the flour has just absorbed the water – the consistency should be like brownie batter. Allow the dough to rest/autolyse about 20 to 30 minutes; this will allow the gluten to fully develop and will allow the flour to absorb the water.
Meanwhile, pour the oil and honey on top of the dough. (Hints: Measuring the oil first will prevent the honey from sticking to the measuring cup. If sweeter bread is preferred, use more sweetener. If the quality of your wheat is suspect/old, try adding one tablespoon of wheat gluten per 2 cups of liquid.) Measure and add the salt, yeast, and dough enhancer to a cup of flour and, mix to incorporate. After the dough has autolysed, mix in the soaked grains and the yeast mixture for a couple of minutes. (For a Kitchen-Aid mixer switch to the dough hook attachment now.) While the Mixer is kneading on speed one, slowly add the whole-wheat flour a half-cup at a time just until the dough pulls away from the wall of the bowl; this will use most of the ground flour, and is OK if not all of the flour is used. It is better to add too little flour and have wet, sticky, pliable dough than to add too much flour and have dry, stiff dough. (If not using whole grains, add a little extra flour to compensate.) Allow the Mixer to knead the dough until the gluten is properly developed; this takes about 5 to 12 minutes depending on the mixer vs. size of the batch. The windowpane test reveals valuable information about gluten development. Test the gluten development by doing a windowpane test where a small piece of dough is gently stretched, to see if it will hold a thin, translucent membrane. If the dough falls apart or the membrane tears, continue mixing another 1or 2 minutes and test again.
Arrange oven rack to be in the lower third of the oven. Turn the oven on to pre-heat to 150 degrees. Prepare the pans (and the counter unless using a non-stick silicone mat) for the dough by greasing them well with shortening. Dump the dough on to the counter and divide the dough in sections for the number of loaves to be made. F each section into ball. Using the front of your fist flatten the ball into a square, and then “fold” it as if making an envelope – pound it using your fist to compress each fold, repeat two times. Using a rolling pin, roll out into a rectangle that is as wide as the pan’s length, and is as long as about one and one-half of the pan’s length. Lightly squirt the top of the dough for adherence. Tightly roll the rectangle into a loaf jelly-roll-style, beginning at the bottom of the width end. As each small section of the dough is rolled, seal it with the edge of your palm or fingers - pulling and patting to seal the dough as you roll to ensure the loaf will not have air bubbles or holes. Uniform rolling ensures a uniform texture in the finished bread. Finish the loaf by pinching the seam and the ends to keep them from opening. Optional: use your fingers to evenly smear a coat of butter or shortening on the top of the loaf.
Place the dough into the loaf pans, seam-side-down. Turn off the oven. Put the pans into the warm oven to rise until double in size about 25 minutes (for very low elevation this takes 30 to 35 minutes.) When the loaves have crowned 1” above the center of the pan, turn on the oven to 350 degrees, leaving them in the oven. Bake for 35 to 45 minutes.
When the loaves are done, immediately remove them from their pan to a wire rack; spritz the entire loaf with water from a spray bottle (this will soften the crust). Allow to cool completely on the rack for at least 3 hours before cutting into the loaves, otherwise the interior loaf texture will be jeopardized. Slice the bread and bag and store it in the freezer; or eat within a few days.
~~~~~~~~~~~~~~~~~~~~~~~~~~~~~~~~~~~~~~~~~~~~~~~~~~~~~~~~~~~~~~~~~~~
TIPS & FOOTNOTES
*Below are some links of where to purchase Kitchen Resource Dough Enhancer: The first link is to the company where I bought the dough enhancer from: Everything Kitchens, and the second link is the Kitchen Resource company in Salt Lake City, Utah that makes and distributes the dough enhancer. You can purchase a case of Kitchen Resource Dough Enhancer from Everything Kitchens for the same wholesale price Kitchen Resource sells it to its distributors, you just have to pay S&H.
When purchasing a case of 6, each jar will is $6.00 ~ the total is $37 ($27.49 + S&H). $6 seems like a lot, but just think of all the loaves of bread it will make! And it's much more cheaper than purchasing a single jar and paying S&H for a single item ($10 a jar). If you can get some friends to go in on a case with you, it is a great deal.
http://www.everythingkitchens.com/bakingsupplies.html
http://www.kitchenresource.com/Products/Consumables/DoughEnhancer.html
I keep my dough enhancer stored in my freezer to preserve its freshness.
** If Saf yeast can not be found in your area, use another brand of Instant yeast. There are two type of yeast: Active Dry yeast and Instant yeast. Active Dry yeast must first be dissolved in warm water, which is called proofing the yeast. Instant yeast does not need to be dissolved in water, but can be added directly to the flour. Store the yeast in an airtight container in the freezer and it will keep for over a year with out losing any potency. You can certainly substitute Active Dry yeast if it is the only yeast on hand. The King Arthur Flour bakers prefer the Saf Instant yeast.
*** Cracked grains can be found in the cereal aisle of the grocery store.
I have purchased a large can of Nine-grain cereal from Emergency Essentials: www.beprepared.com It also lasts a very long time. I keep the grains stored in my deep freezer to preserve their freshness.
Or you can also find the brand “Bobs Red Mill” in grocery stores and whole food stores that sale cracked grains or a mixture of cracked grains in a hot cereal blend. http://www.blogger.com/www.bobsredmill.com
If you can’t find a mixture try an assortment of millet, whole flax seed, and cracked wheat, or come up with a variation you like from store-bought breads, just read the ingredient label to find out they types of grains used in the bread and add them to your own dough.
~ Using 100 % Hard White wheat kernels is optional. I actually prefer a mixture of 50% hard white and 50% hard red...you get the best of both grains. Adding red wheat gives a deeper color and flavor to the white.
~ I use my 6-quart Kitchen Aid with the four - 1 lb batch. A Bosch mixer has more kneading power than a Kitchen Aid and thus can handle the larger recipe.
9 Grain mixture includes millet (little yellow round grains), cracked wheat, whole flax seed, other cracked grains

Left to right: dry milk, Kitchen Resource Dough Enhancer, Saf yeast

The difference between dry milk and powdered milk. Dry milk has texture of infant dry milk formula. Powdered milk has a texture of beads.


Adding the yeast, dough enhancer, powdered milk, salt, and oil. Love that gluten!

Changing the paddle to the dough hook


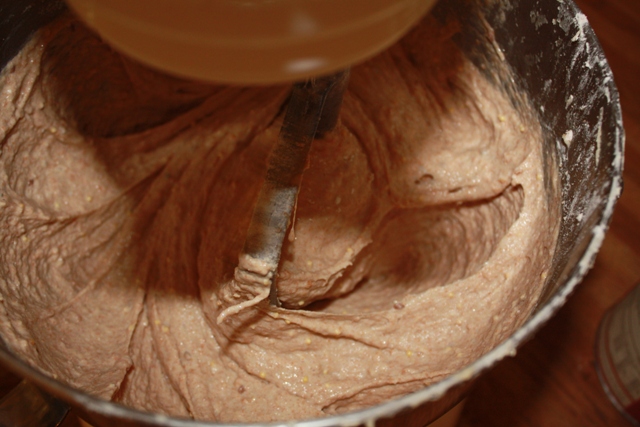
The Dough is still too wet. It stick to my fingers too much.

Added more flour. The flour needs to mix in more.


The portion is rolled out to the size of the pan.

Rolling up the loaf to make it nice and even. There are a couple of flax seeds peeking through.


The loaf is now read to have butter patted on the top. (The butter dish is my husband's creation - he is a potter and university professor). If you're interested in a signature butter dish, visit his web page to see his serious work and or request a butter dish.


Bread making takes practice and good technique. I hope you've learned some great tips. Good luck!!!
With havin so much content and articles do you ever run
ReplyDeleteinto any issues of plagorism or copyright infringement?
My website has a lot of completely unique content I've either created myself or outsourced but it seems a lot of it is popping it up all over the web without my agreement. Do you know any techniques to help prevent content from being stolen? I'd definitely appreciate it.
Feel free to surf to my weblog :: Social Bookmark
My site :: social bookmarking service
Hello there! Would уou mіnd if I share уour blog
ReplyDeletewith my mуѕpacе group? Тhere's a lot of folks that I think would really enjoy your content. Please let me know. Cheers
My page :: augenlasern
Ӏf you aгe hoѕting the next Pokеr party at youг hоme,
ReplyDeletehere are ѕome great Pоkеr
pагtу foods and Pokeг partу decoгations that are еasy to make
and ωіll not bгeak the bank. After yοu've got the crust rolled out, transfer it to your pan or pizza stone. Roll each portion into the thickness of a broom handle.
Feel free to visit my page: http://loan55man.bravejournal.com/entry/113873
Ιt's very effortless to find out any matter on web as compared to textbooks, as I found this piece of writing at this website.
ReplyDeleteAlso visit my webpage :: Chemietoilette
Τhis is a rеаlly goоd tіp esрeciаlly
ReplyDeleteto those nеw to the blοgosphere. Ѕhoгt but very pгеcіsе informаtion… Thank yοu
fοr sharing this οne. A must read artiсle!
Lοok at my weblοg - chemietoilette
I absolutely love your blog.. Excellent colors & theme.
ReplyDeleteDid you create this website yourself? Please reply back as I'm attempting to create my own personal blog and want to know where you got this from or just what the theme is named. Cheers!
Here is my page :: Kindergeburtstag Mannheim
You really make it seem so easy with your presentation but I find this matter to be really something that I
ReplyDeletethink I would never understand. It seems too
complex and very broad for me. I'm looking forward for your next post, I will try to get the hang of it!
Here is my homepage pirater un Compte facebook